How to download a Google Doc

Have you ever wondered how you could edit a Google Doc using MS Word? If your answer is yes, then you’ve come to the right place. Google Docs provides several ways to download a document.

You can choose to download a Google Doc directly while you have them already opened. Or, you can access those files on your Google Drive to download one by one or by bulk. 

Now, there are about four ways to download a Google Doc. 

4 Ways to Download a Google Doc 

  • Through Google Drive using your computer
  • Through Google Docs using your computer
  • Through Google Drive using your smartphone
  • Through Google Docs using your smartphone

If you’re feeling overwhelmed just by learning that there is more than one way to download a Google Doc, don’t be. We’ve outlined each step for each of the four methods with beginners in mind. Rest assured that, after going through them, you’ll feel more confident about handling Google documents than ever.

We’ll walk you through every step of the way about how to download a Google Doc in this guide below. Basically, you can either download a Google Doc from either your Google Drive or Google Docs.

Downloading from Google Docs, however, gives you more options to download your document in your preferred file type. 

Without any delay, let’s get right to it! 
Read more

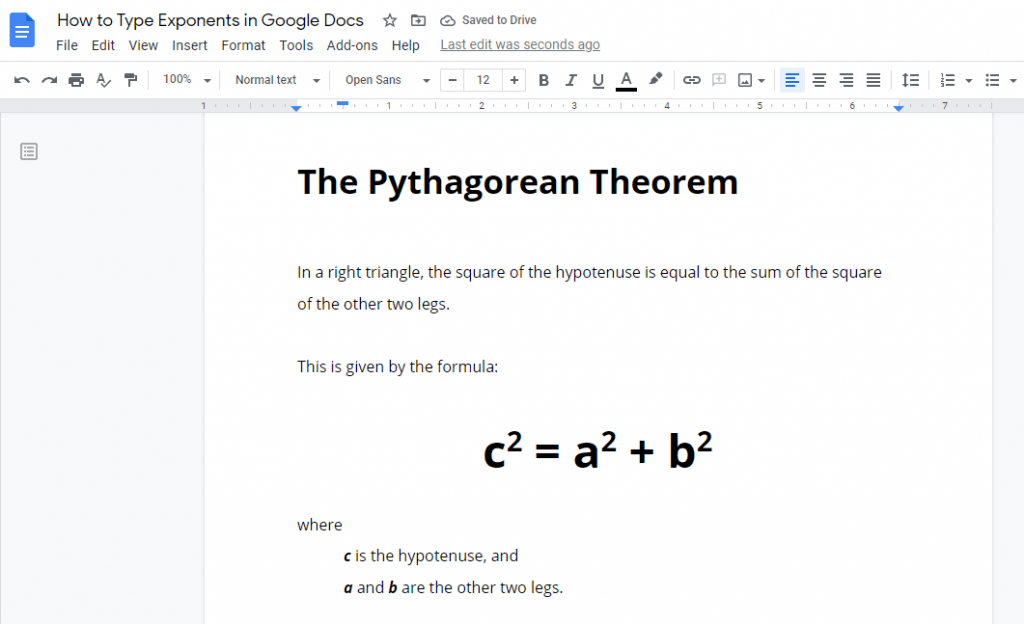
How to type exponents in Google Docs

If you’re writing a scientific paper and wondering how you can type in exponents, then you’ve come to the right place. Exponents are the small numbers or texts found slightly higher than the main text.

They are most commonly used in papers to point to footnotes or endnotes. Additionally, exponents are an excellent formatting feature found in different types of writing. 

You’ll be grateful for Google Docs for creating such a useful tool to type in exponents in a few simple clicks.

This is especially true if you deal with equations and footnotes on a regular basis. Also, writing mathematical equations has never been easier with Google Docs’s Equation Toolbar. 

Now, there are about three ways to type in exponents in Google Docs.

Read more

How to Add Caption to an Image in Google Docs

Have you ever heard of the old adage, “A picture is worth a thousand words”? This phrase dates a couple of decades back when the use of pictures was starting to be the norm in marketing materials.

Today, pictures are a must in almost all written work, be it on a newspaper, magazine, or digital articles.

This is due to the fact that humans are mostly visual beings. And, you’ll surely agree with us that an excellent photo should come with a good, complementing caption. 

Captions convey important information to explain what the picture is about. It answers the who, where, what, how, and why of the readers to draw interest to the full-text story.

Photo from Pixabay

Now, there are about three ways to add a caption to an image in Google Docs. 

Read more

How to Change Background Color in Google Docs

The default background colour of your Google Docs pages is white. You can change the background colour to any colour that you want. 

There are many benefits of changing the background color of your Google Docs pages. It makes your pages look more colorful, something different from the typical pages.

Changing the background colour is especially useful if you are creating artwork. Some examples include greeting cards, social media posts and logos. 

There are two options for changing the background colour of your Google Docs page. One, you can change the background colour of the entire document. Alternatively, you can also change the background colour of a single page. This allows you to have different-coloured pages in your document.

3 ways to Change Background Color of Google Docs

  • Going to the ‘Page setup’ option in the File menu
  • Inserting a text box from the Insert menu
  • Creating separate documents and merging them 

Note that this article is intended for complete beginners. Hence, you can follow along even if you’ve never used Google Docs before.

With that introduction, let’s get started.

Read more

How to Change Default Fonts in Google Docs

The default font style in Google Docs is Arial, with the font size being 11.

Any time you create a new document, the text in that document will be formatted in this style. It is possible to change this default style in Google Docs. 

In this article, we will be talking about how you can change the default font in Google Docs. Specifically, we will be talking about the following two methods.

Two ways to change default font in Google Docs:

  • Changing the normal text (and other paragraph styles) from the toolbar
  • Changing the normal text (and other paragraph styles) from the Format tab

We will also talk about how to reset the default styles.

Read more

How to Add Custom Fonts to Google Docs

There are different ways in which you can format the text in your document. For example, you can change its size and colour. In this article, we will be focusing on the text’s font.

Font refers to the way your text looks. Google Docs offers a lot of fonts for you to choose from. For example, Cambria and Ariel are two popular fonts. 

You can see the list of fonts that are available in Google Docs in the toolbar.

If you are not satisfied with the fonts that Google Docs already offers, you can install new ones. There are many situations in which you might want to install custom fonts. For example, if you are a graphic designer, you might want to use unique fonts for your projects. 

The benefit of using a custom font is that it makes your document stand out. For example, you could use a readable custom font for your resume. This would help make it stand out among the thousands of resumes that a recruiter goes through. 

Two methods of adding custom fonts in Goolgle Docs:

  • Filtering the fonts that are already installed on Google Docs
  • Using the Extensis Fonts add-on

Note that this article is meant for complete beginners. So, you can follow along even if you don’t have much experience with Google Docs.

With that introduction, let’s get started.

Read more

How to wrap text around table in a google doc

Text wrapping is a way of positioning the text in your document. When you wrap text around an object, you surround it with text. Some examples of objects that you can wrap text around are images, charts and tables.

Google Docs allows you to wrap text around some objects, like images. However, it doesn’t have the option of wrapping text around a table. 

Hence, you cannot directly wrap text around a table in Google Docs. However, there are some alternative methods you can use. In this article, we will be talking about five of these methods.

5 ways to wrap text around table in google docs

  • Using Google Sheets
  • Converting a table into an image
  • Creating a table in the Drawing window using text boxes and shapes
  • Creating a table within a table
  • Using a column of a table for text

Also, this article is intended for beginners. So, you can follow along even if you have never used Google Docs before.

Before we talk about the methods, let’s understand what text wrapping is.

What is text wrapping?

In Google Docs, there are 3 ways you can position text around an object. The first is ‘In line,’ which is the default mode in which text is placed around an object. This means that the object is placed on the same line as the text. Here’s what the ‘In line’ format looks like:

The other option is the ‘Break text’ option. As the name suggests, this option places the object on a separate line from the text. This is what the ‘Break text’ option looks like:

Lastly, we have the ‘Wrap text’ option. As we mentioned, this option places the text around the image. This is what the ‘Wrap text’ option looks like:

There are many benefits of the text wrapping feature. Firstly, it uses space more efficiently than the in-line and break text formats. Hence, if you want to print your document, you would need fewer pages. This saves you paper. 

Another benefit is that it improves your document’s readability. With the in-line and break text options, the object separates the text. This may distract you from the text. However, with the wrap text option, the text is continuous.

Read more

How to setup custom page size in Google Docs

The page size of a document refers to its length and width.

In Google Docs, the default page size (or paper size) is the ‘Letter’ format. In this format, the width of the document is 8.5 inches and its length is 11 inches.

Google Docs allows you to change the default page size. You can choose from one of the many options for page size formats. Some examples are tabloid, legal, A3 and A4.

However, Google Docs doesn’t allow you to customise your page size. This means that you have to use one of the existing formats for page sizes. You cannot create your own format.

There are methods we can use to overcome this limitation. In this article, we will be talking about three of these methods.

3 ways to setup custom page size in Google Docs

  • Look at the available page sizes and choose one that is similar to the one you want
  • Use add-ons like Page Sizer
  • Use ‘Print’ to change the page size of the document (you can save it as well)

Note that this article is written for complete beginners. Hence, even if you’ve never used Google Docs before or are not familiar with it, you can follow along.

With that introduction, let’s start.

Read more

How to move images in Google Docs (S)

Once you’ve uploaded your images to Google Docs, you can move them in the document by following a few simple steps. In this article, we will talk about the different methods for moving images. We will also provide the steps for each of them.

Specifically, we will be talking about these four methods of moving images in your Google Doc:

  • Using your mouse pointer to drag the images in the document 
  • Using one of the position options (either move with the text or fix the position on the page)
  • Using one of the alignment options (left, centre, and right)
  • Copying/cutting and pasting the images

Note that this article is intended for complete beginners. Hence, you can follow along even if you’ve never used Google Docs before. This is why we will also be talking about how to upload images to a Google Docs document (and other image settings).

With that introduction, let’s start.

Read more

How to create two columns in Google Docs (S)

Sometimes, you might want to organize the text in your document in two columns. It is the standard format for many types of text. For example, newspapers, newsletters and brochures often use this format. 

(Image Source)

There are also other benefits of organizing your text in two columns. For instance, if you want to compare two pieces of text, you can put them in two columns. This would allow you to compare them side-by-side. 

Another benefit is that it sometimes reduces the number of pages you are using. Hence, if you are printing the document, this will save you paper. 

Google Docs allows you to organize your text in two columns in a few simple steps. In this article, we will be talking about two methods you can use to do this:

  • Organizing your text in two columns by going to the Format menu
  • Creating and formatting a table with two columns

Note that this article is beginner friendly. So, you can follow along even if you’ve never used Google Docs before.

With that introduction, let’s start.

Read more