Information about your document is available in the Advanced Properties dialog box. But, you can also add custom properties. Word allows you to store the additional information in your document. We will show you in step-wise instructions how you can add custom document properties.
Let us start.
Step #1: Open the Word document.
Open the Word document in which you want to add the custom information.
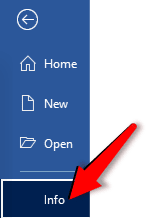
Step #2: Open the Info section
Click on the File tab in the top menu bar to open the File menu.

In the left-hand section, click on the Info tab to change the display in the right-hand section.
In the right-hand section, click on the Properties tab to display another tab, Advanced Properties.
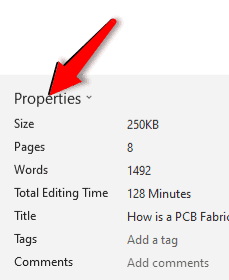
Click on the Advanced Properties tab.

This will open the Advanced Properties dialog box. Click on the Custom tab.
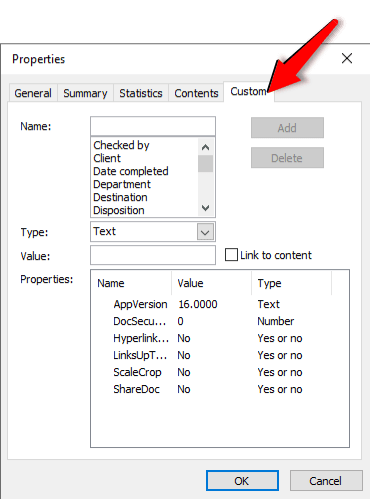
Step #3: Enter Custom property
Under the section Name, search for the property you want to add.
You can also type the name of the property in the empty box on the right of Name:.
On the right side of Type:, select the type of property you are entering:
- Text
- Date
- Number
- Yes or No
Type the value in the box on the right-side of Value:.
Click on the Add tab to add the property.
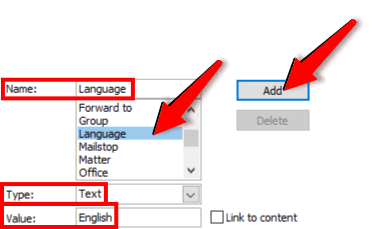
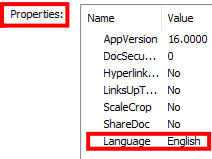
Word adds the new document property in the last line under Properties.
The custom property you have added may not be visible on the Info screen.
Conclusion
We have shown you how you can add custom document properties to your Word document. Insert the property into your document using a field function.