An outline is an important part of any professional document. Without an outline, everything looks muddled, and the vital parts lose significance.
In addition, a document without an outline is hard to follow and lacks readability. Finally, an outline also serves as a table of contents with anchor links to jump to a specific section of a document.
So, in this tutorial, we’ll see the easiest procedure to convert an untidy document into a formal one by adding an outline.
Without any ado, let’s begin.
Step 1: Open Your Google Docs File

This is the file without any headline attributes:

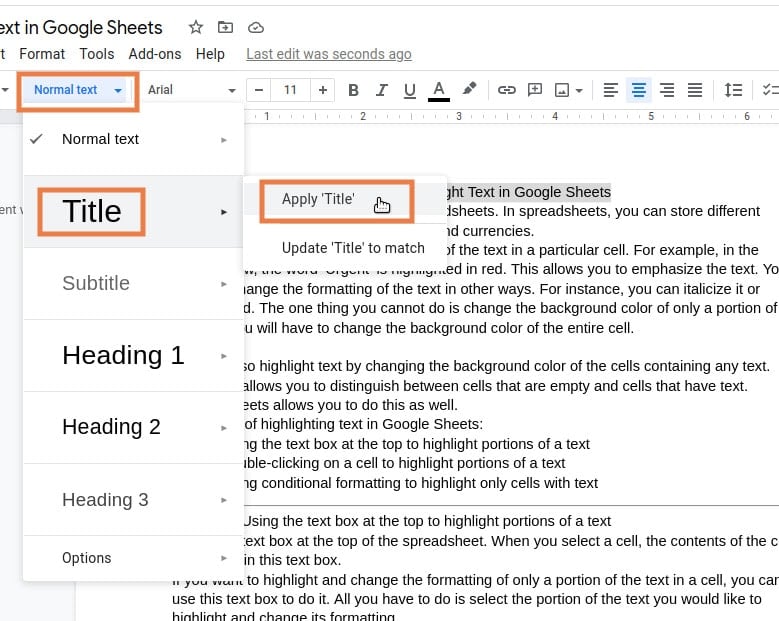
There are seven types of text attributes in Google Docs:
Normal Text, Title, Subtitle, and Heading 1 (H1) to Heading 4 (H4). It’s not necessary to use them all. For instance, in the shown document, I’ll be using Title, H2, H3, and H4. And whatever we use will be shown in the outline section with anchor links.
Step 2: Assign Title
Let’s start with the title. For this, select the title and click the tab showing Normal text in the toolbar beside the font type. Then hover on the Title tab from the dropdown and finally click Apply Title from the pop-up at the right.
That’s the result:

Step 3: Assign Remaining Headings
Now you can see the outline section with the Title anchor. Let’s do this again for creating an H2 heading.
The process is similar, have a look:

So the output after repeating this process for every heading is:

Now you can click any heading from the outline for reading a particular section. This process is quite useful for lengthy documents as it saves the scrolling part.
Conclusion
That’s it for this tutorial. Please comment for any queries.