Dashed lines can be useful in some presentations. It is very easy to draw dotted lines in PowerPoint.
We will show you how to add dotted lines in your presentation.
Let us start.
Step #1: Open the presentation
Open the PowerPoint presentation. Navigate to the slide where you want to insert the dotted line.
Step #2: Create a line
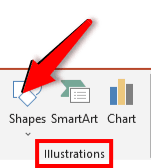
- Go to Insert -> Illustrations.
- Under Illustrations, click on the Shapes icon.
- This will open a list of Shapes. Select the straight line.
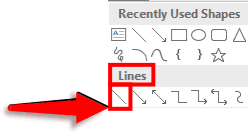
- The cursor will change to a cross.
- Click and drag the cross from where you want to start the line to the end.
- PowerPoint will introduce the line in the slide.

Step #3: Change the line to dotted
- Click on the line. This will change the ribbon.
- Under the section Shape Styles, Click on Shape Outline.
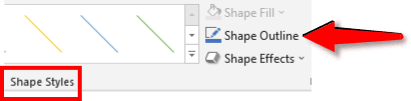
- Go to Shape Outline – > Dashes.
- This opens the Dashes menu. Select the dash type you prefer.
- After that go to Shape Outline -> Weight.
- This opens the Weight menu. Select the thickness of the line.


- PowerPoint will change the line to the dash type and weight you have selected.

Conclusion
We have shown you an easy way to add a dotted line to your presentation. Use it to add different types of dotted lines to your slides.