How to merge table cells in MS Word

Mergagin table cells allow you to join two or more cells into one larger cell.

Here is an example of a table with merged cells.

Word makes it easy to merge cells in a table.

3 Ways to Merge Table Cells in MS Word

  • Using the Layout Tab in the Ribbon
  • Using the Context Menu 
  • Using the Table Eraser Tool 

Important note: Merging cells will combine and delete the data of certain cells. By default, the top-left most cell’s information will be retained and used in the new merged area. Keep this in mind as this may delete the information of some cells without you meaning to do so.

Read more

How to add custom fonts in MS Word

In this tutorial we will share technique to add custom fonts in MS Word

Now, there’s only one way that you can do this but it involves certain complicated steps.

How to Add Custom Fonts in MS Word

  •  Downloading and Installing custom fonts

Let’s get started!

Read more

How to Remove a Hyperlink in MS Word

Sometimes, you might notice that there are clickable links within your documents. These links are commonly known as hyperlinks.

MS Word has an automatic feature that adds hyperlinks to words, especially when you type in or paste URLs.

Yet, there are instances wherein you having these works hyperlinked is unnecessary.

In this article, we’ll guide you through the different methods that you can use to remove hyperlinks.

3 Ways to Remove Hyperlinks in MS Word

  • Using the Right-click + Remove Hyperlink command
  • Using the Keyboard shortcut
  • Using the AutoCorrect dialog box

Let’s get started!

Read more

How to insert a hyperlink in MS Word

Hyperlinks provide an easy way of navigating to different sources or sections in your document. With this feature, you can redirect your readers to an outside source or a certain place within your file. This feature helps you format your document into a more organized and easy-to-navigate form.

3 Ways to Add a Hyperlink in MS Word

  • Using the Link command from the Insert tab
  • Using the Keyboard shortcut
  • Using the Right-click + Link command

Read more

How to change default font in MS Word

You know the default body font which comes with your MS Word Software Installation?

The answer is:

Calibri, 11pt.

Your font will always be the same every time you open a new Word document unless you change it before you start typing.

Have you ever wondered how you could change that? 

Having a personalized font set up as the default body theme in MS Word is a clever way to save time. It also allows you to create a new document without having to change the font repeatedly. This is particularly true for those of us that have our own personal fonts that we like using. The same set of fonts we use in our articles make it a distinctive piece of work. However, we do not want to go through the hassle of always changing the font every time we open MS Word. Fortunately, we can change the default font easily. 

Now, there are about three ways to change the default font in MS Word. 

3 Ways To Change Default Font In MS Word

  • Using the Ribbon
  • Using the Context Menu
  • Using a Shortcut Key

Without further ado, let’s get on with it. 

Read more

How to create a hanging indent in MS Word

Citing of sources is a must in most, if not all, reading materials. Various citation styles require hanging indents to format your list of sources.

This is a common format commonly found in bibliographies, reference lists, and cited works.

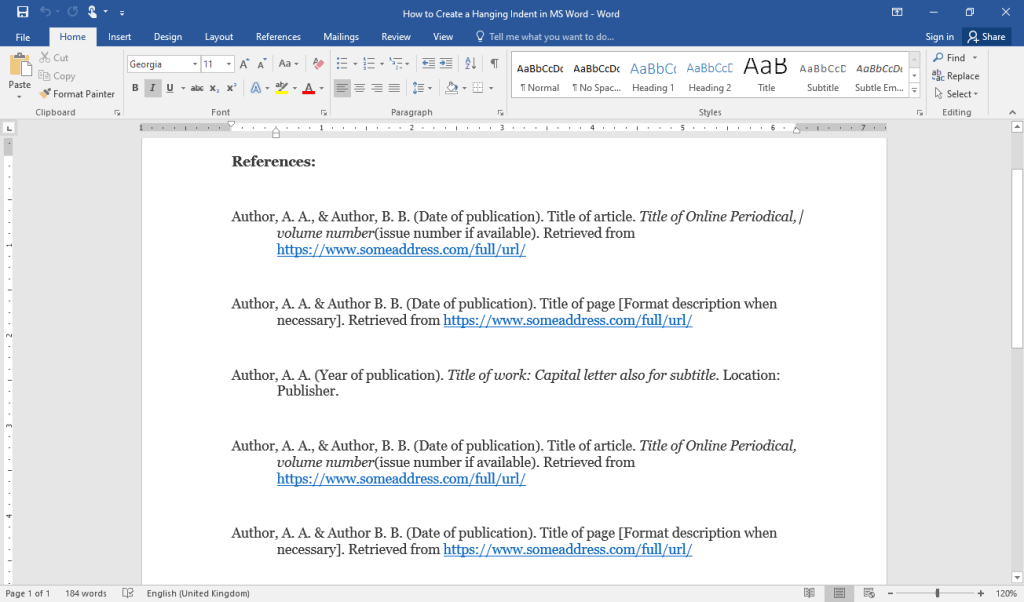
Here is how a Hanging Indent looks like:

A hanging indent is basically the opposite of what we usually see in common paragraph indentations, where the first line is indented.

When hanging indentation is used, the first line is not indented while the rest of the paragraph is.

Formatting each line of your citation with hanging indents makes it easier to be distinguished from the others.

It also allows your readers to quickly spot the citation details like the author names, publication dates, and place, pages, etc.  

Now, there are about three ways to create a hanging indent in MS Word. 

3 Ways to Create a Hanging Indent in MS Word

  • Using the Ribbon
  • Using the Context Menu
  • Using the Ruler

Having said that, let’s get started! 

Read more

How to add a table of contents in a word document

When reading a book, the table of contents makes it easier to navigate through the contents. You can also generate a table of contents in your Word document.

A table of contents helps especially when your document is large. It allows the reader to locate and navigate to a specific topic of interest. This also makes your document more user-friendly. At the same time, it becomes easier for you to edit the content in your document.

To add a table of contents, your document must be using the first three heading styles. These are Heading 1, heading 2, and Heading 3.

You can add the heading styles as you are writing the document. But if you have not done so, you can add them later as well. Once you have added the heading styles, you can create the table of contents.

Word allows you to:

  • Create a table of contents
  • Update the table of contents
  • Remove the table of contents

Let us show you how to apply each of the above.

Read more

How to Lock a Word Document

Locking your Word document has many benefits. You can make what-if comparisons to see how some changes will affect your document. As you have locked your document, there is no danger of the changes becoming permanent. You can change the document as you want, and if the result is not acceptable, you simply walk away. Your original document remains safe.

The above works at a personal level. But you may be sharing a document. If you do not want others to make any changes, you must lock it more securely. Therefore, you protect the document from editing by making it read-only.

3 ways to Lock a Word Document:

  • Lock it for personal use
  • Lock parts of the document for public use
  • Lock the entire document for public use

Let us start.

Read more

How to Password Protect a Word Document

There can be several reasons for wanting to protect your document. For instance, when you share a document, you may want only a selected few to view and/or edit your document.

You may have sensitive information in your document that you do not want others to know.

For all this, you may encrypt your document with a password. Until the other person has the password, they cannot open the document.

We will show you how to achieve this in simple stepwise instructions.

Let us begin.

Read more